Explore Razor View Engine
Recently
I decided to have some hands on ASP.net MVC. There are few good articles to
start on ASP.net MVC and know why & where to use ASP.net MVC model. After
stepping into the MVC model I reached to the point where we need to decorate
Views.
Views
are user facing in form of UI (User Interface).Passing data from the Controller
to a View so that view can render HTML output for the users. User does not know
what you are doing at backend (Controller or Model), but only the UI.
In
ASP.net MVC 1 & 2, MVC has relied on the standard ASP.net View Engine,
which depends on the ASP.net block <% and %>. This is common in your
ASP.net development if you want to access any server side data on your ASPX
page.
In
ASP.net MVC 3, the new Engine has been introduced called Razor View Engine, which
replaced the standard block with @ character. The new Engine is quite easy and
faster than the old view engine.
“The .cshtml file extension denotes a C#
view that will be processed by Razor. Previous versions of MVC relied on the
ASPX view engine, for which view files have the .aspx extension.”
To
demonstrate the Razor View Engine in MVC, let’s create a small ASP.net MVC
project. You can use Visual Studio 2010 or latest 2012 to create a new project.
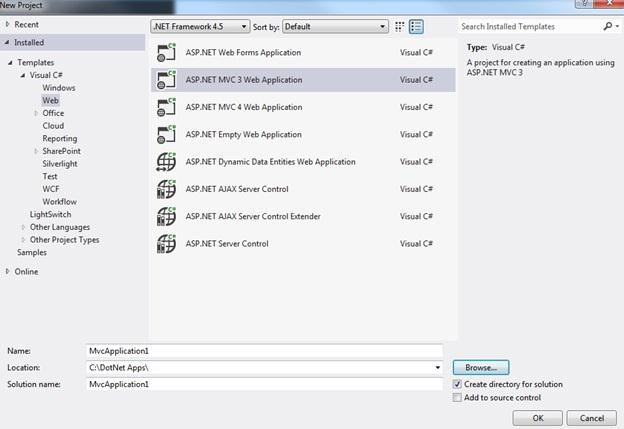
Let’s
build the simple Employee information ASP.net MVC Project. Create a new Project
& choose the ASP.net MVC 3 template from the Visual Studio as shown below
in Figure 1.
Visual
Studio will prompt for Project Template as shown in Figure 2. We will take the
Intranet Application and Choose the View Engine as Razor as shown in Figure 2.
Intranet Application has some startup Controllers and Views to build the
starting project.

Let’s
create a model class called “Employee” which will hold our Employee information
data for us.
Defining Model
Employee.cs
using System;
using System.Collections.Generic;
using System.ComponentModel.DataAnnotations;
using System.Linq;
using System.Web;
namespace EmployeeInfo.Models
{
public class Employee
{
[Display(Name="Employee
ID")]
public int EmployeeID { get; set; }
[Display(Name = "Employee
Name")]
public string EmpName { get; set; }
[Display(Name = "Employee
Address")]
public string EmpAddress { get; set; }
[Display(Name = "Employee
Phone")]
public string EmpPhone { get; set; }
[Display(Name = "Employee
Salary")]
public double EmpSalary { get; set; }
}
}
Defining Controller
Now
let’s define the controller class which will communicate to the model class defined
above. We will create an empty controller to demonstrate it simple and easy to
learn about Razor for now.
We
are going to initialize our Model (Employee) in our controller for simplicity.
Sample is shown in below listing.
EmployeeController.cs
using
System;
using
System.Collections.Generic;
using
System.Linq;
using
System.Web;
using
System.Web.Mvc;
using
EmployeeInfo.Models;
namespace
EmployeeInfo.Controllers
{
public class EmployeeController :
Controller
{
//
// GET: /Employee/
public ActionResult Index()
{
Employee emp = new Employee
{
EmployeeID=1,
EmpName="Kapil",
EmpAddress="Some Where in
this World!!!",
EmpPhone="777-777-7777",
EmpSalary=500
};
return View(emp);
}
}
}
As
you can see we have created two main part of MVC i.e. Model and Controller. We
are going to focus on Razor so will not go deep into Model and Controller for
now.
To
understand more how to use Razor Syntax, we will create a View for the above
Controller. The controller is storing some data to model and passing the model employee
to the view.
As
you can see in our controller, the action is Index which will have the
corresponding view “Index.cshtml” as per the convention.
Use Model Object in
View
Once
you create a View, you can define whether to use the strongly typed View from model
as shown in Figure 3

Figure 3
Note: You need to compile your project to
use the strongly typed view otherwise you will not see your model in your Model
Class dropdown option.
Once
you add the View it will create an empty view with few lines as shown in below
listing
@model
EmployeeInfo.Models.Employee
@{
Layout = null;
}
<!DOCTYPE html>
<html>
<head>
<title>Index</title>
</head>
<body>
<div>
</div>
</body>
</html>
In
above listing you will notice some Razor syntax, let see what is that all
about? First line is interesting here @model
EmployeeInfo.Models.Employee, it uses the Razor
syntax i.e. @ to tell the view about the Model which we have created earlier.
We can use the properties, methods and fields define in Model using @Model
property.
Our
view is strongly typed which bound with our Employee model so that view will
get all the information of Employee stored in our Employee Model as listed
below.
@model
EmployeeInfo.Models.Employee
@{
Layout = null;
}
<!DOCTYPE html>
<html>
<head>
<title>Index</title>
</head>
<body>
<div>
<h1>Employee ID: @Model.EmployeeID</h1>
<h2>
Employee Name: @Model.EmpName
<br />
Employee Address: @Model.EmpAddress
<br />
Employee Phone: @Model.EmpPhone
<br />
Employee Salary: @Model.EmpSalary
</h2>
</div>
</body>
</html>
Above
we use the @Model.propertyName which
get the property value define in the Employee Model. Let’s have some C# code in
our view, let’s do it.
<div>
<h1>Employee ID: @Model.EmployeeID</h1>
<h2>
Employee Name: @Model.EmpName
</h2>
<h3>
@if (@Model.EmpSalary > 100)
{
<p>Salary @Model.EmpSalary Wow it's Good...</p>
}else{
<p>Salary @Model.EmpSalary
Need some more!!!</p>
}
</h3>
</div>
Here
we used If block with Razor syntax
and View engine is smart enough to know what needs to rendered as the HTML
block which we define inside the If condition.
In
above sample code everything’s looks good. But what if we change the HTML text
like below where the HTML Text is start without any Tag?
You
will get some error on page when you run the application.
@if (@Model.EmpSalary > 100)
{
Salary @Model.EmpSalary
Wow it's Good...</p>
}else{
<p>Salary @Model.EmpSalary Need some more!!!</p>
}
Here
Razor View engine needs your help to define/decorate the text is “HTML text”
which is define without any HTML Tags. To define that we need to start the text
with @: so that Razor will treat that
text as HTML text
@if (@Model.EmpSalary > 100)
{
@:Salary @Model.EmpSalary
Wow it's Good...</p>
}else{
<p>Salary @Model.EmpSalary Need some more!!!</p>
}
Now
you have got good idea and familiar with Razor Syntax and its use. It’s not
only you can use any conditional statements but you can use any C# code like loops, functions, and calling any existing
C# objects like displaying DateTime etc.
For
e.g.
Time
now is @DateTime.Now
Handle IEnumerable Data in
View
Now let’s take one step further and
see how we can deal with IEnumerable data pass from controller to view.
I am going to modify the controller to
have List of Employees and pass that list object to view and we will see how we
can iterate the employee from that List in view. Modified Controller is listed
below.
using System;
using System.Collections.Generic;
using System.Linq;
using System.Web;
using System.Web.Mvc;
using EmployeeInfo.Models;
namespace EmployeeInfo.Controllers
{
public class EmployeeController : Controller
{
//
// GET:
/Employee/
public ActionResult Index()
{
IEnumerable<Employee> emps = new List<Employee>{
new Employee{EmployeeID=2,EmpName="Amit",EmpSalary=600},
new Employee{EmployeeID=3,EmpName="Sunil",EmpSalary=800},
new Employee{EmployeeID=4,EmpName="Satish",EmpSalary=900},
new Employee{EmployeeID=1,EmpName="Kapil
Deo",EmpSalary=1900}
};
return View(emps);
}
}
}
View
needs to handle the IEnumerable because the controller is returning IEnumerable
data to view. To handle that we are going to modify our View to handle the
IEnumerable object in the following way
@using EmployeeInfo.Models
@model
IEnumerableEmployee>
@{
Layout = null;
}
<!DOCTYPE html>
<html>
<head>
<title>Index</title>
</head>
<body>
@* Iterating
to the List of Model from controller *@
<div>
@foreach (var emp in Model)
{
@:ID :- @emp.EmployeeID <br/>
}
</div>
</body>
</html>
We
are telling View here that iterate the IEnumerable employee Model as you can
notice in line 2. To iterate the model we are using foreach loop and displaying
Employee ID.
Some Handful Razor Syntax
There
are few more syntax which I would like to cover in this article are mentioned
below
- 1. Add Comments on View
@* …… *@ is used
in View to comment the line or block
- 2. Wrap the nested content using
block
@if(condition) {
Text contents goes here
}
- 3. Combine Multiple statements
@{
If(condition){
}
If(another condition){
}
String mesg = “Everything looks good”;
Your message mesg
}
No comments:
Post a Comment